1、首先准备一台windows的电脑,我的是dell笔记本,windows10的操作系统
第一步:安装Chocolatey和编译环境依赖项
安装Chocolatey
用管理员身份启动PowerShell,然后执行以下命令:
Set-ExecutionPolicy Bypass -Scope Process -Force; [System.Net.ServicePointManager]::SecurityProtocol = [System.Net.ServicePointManager]::SecurityProtocol -bor 3072; iex ((New-Object System.Net.WebClient).DownloadString('https://chocolatey.org/install.ps1'))
安装完成执行choco -?验证是否安装成功,如果遇到问题,请参阅官方网站的详细说明(https://chocolatey.org/install)
继续在管理员身份启动PowerShell中,执行以下命令:
安装git:
choco install git
安装完之后,找到Git-bash,启动后执行以下命令,git要求版本在2.19.1以上:
$ git --version git version 2.20.1.windows.1
安装golang:
choco install golang
安装完之后,在命令行中键入 go version ,如果提示找不到该命令,则需要在path中添加golang的安装路径,并且要求版本在1.7以上。
我电脑下执行后的显示如下:
$ go version go version go1.13.8 windows/amd64
安装mingw:
choco install mingw
安装完之后,在命令行中键入
$ mingw32-make -v GNU Make 4.2.1 Built for x86_64-w64-mingw32 Copyright (C) 1988-2016 Free Software Foundation, Inc. License GPLv3+: GNU GPL version 3 or later This is free software: you are free to change and redistribute it. There is NO WARRANTY, to the extent permitted by law.
$ gcc -v Using built-in specs. COLLECT_GCC=C:\ProgramData\chocolatey\lib\mingw\tools\install\mingw64\bin\gcc.exe COLLECT_LTO_WRAPPER=C:/ProgramData/chocolatey/lib/mingw/tools/install/mingw64/bin/../libexec/gcc/x86_64-w64-mingw32/8.1.0/lto-wrapper.exe Target: x86_64-w64-mingw32 Configured with: ../../../src/gcc-8.1.0/configure --host=x86_64-w64-mingw32 --build=x86_64-w64-mingw32 --target=x86_64-w64-mingw32 --prefix=/mingw64 --with-sysroot=/c/mingw810/x86_64-810-posix -seh-rt_v6-rev0/mingw64 --enable-shared --enable-static --disable-multilib --enable-languages=c,c++,fortran,lto --enable-libstdcxx-time=yes --enable-threads=posix --enable-libgomp --enable-lib atomic --enable-lto --enable-graphite --enable-checking=release --enable-fully-dynamic-string --enable-version-specific-runtime-libs --disable-libstdcxx-pch --disable-libstdcxx-debug --enable- bootstrap --disable-rpath --disable-win32-registry --disable-nls --disable-werror --disable-symvers --with-gnu-as --with-gnu-ld --with-arch=nocona --with-tune=core2 --with-libiconv --with-syst em-zlib --with-gmp=/c/mingw810/prerequisites/x86_64-w64-mingw32-static --with-mpfr=/c/mingw810/prerequisites/x86_64-w64-mingw32-static --with-mpc=/c/mingw810/prerequisites/x86_64-w64-mingw32-s tatic --with-isl=/c/mingw810/prerequisites/x86_64-w64-mingw32-static --with-pkgversion='x86_64-posix-seh-rev0, Built by MinGW-W64 project' --with-bugurl=https://sourceforge.net/projects/mingw- w64 CFLAGS='-O2 -pipe -fno-ident -I/c/mingw810/x86_64-810-posix-seh-rt_v6-rev0/mingw64/opt/include -I/c/mingw810/prerequisites/x86_64-zlib-static/include -I/c/mingw810/prerequisites/x86_64-w64 -mingw32-static/include' CXXFLAGS='-O2 -pipe -fno-ident -I/c/mingw810/x86_64-810-posix-seh-rt_v6-rev0/mingw64/opt/include -I/c/mingw810/prerequisites/x86_64-zlib-static/include -I/c/mingw810/p rerequisites/x86_64-w64-mingw32-static/include' CPPFLAGS=' -I/c/mingw810/x86_64-810-posix-seh-rt_v6-rev0/mingw64/opt/include -I/c/mingw810/prerequisites/x86_64-zlib-static/include -I/c/mingw81 0/prerequisites/x86_64-w64-mingw32-static/include' LDFLAGS='-pipe -fno-ident -L/c/mingw810/x86_64-810-posix-seh-rt_v6-rev0/mingw64/opt/lib -L/c/mingw810/prerequisites/x86_64-zlib-static/lib -L /c/mingw810/prerequisites/x86_64-w64-mingw32-static/lib ' Thread model: posix gcc version 8.1.0 (x86_64-posix-seh-rev0, Built by MinGW-W64 project)
安装cmake:
choco install cmake
安装cmake之后,在命令行中键入cmake,如果提示找不到该命令,则需要在path中添加cmake安装的路径。
$ cmake Usage cmake [options] cmake [options] cmake [options] -S -B Specify a source directory to (re-)generate a build system for it in the current working directory. Specify an existing build directory to re-generate its build system. Run 'cmake --help' for more information.
以下命令均需在
Git-bash环境运行!
第二步:源码编译安装
获取源码
前提:需要配置好golang环境
并在当前%GOPATH%目录下创建src/github.com/PlatONnetwork/和bin目录,在PlatONnetwork目录下克隆PlatON-GO的源码:
cd src/github.com/PlatONnetwork/;
git clone -b release-0.8.0 https://github.com/PlatONnetwork/PlatON-Go.git --recursive
编译
进入源码目录PlatON-Go:
cd PlatON-Go
在编译源码目录之前在源码目录PlatON-Go下执行以下脚本编译所需依赖库:
./build/build_deps.sh
由于编译依赖bls库,需要把PlatON-Go\crypto\bls\bls_win\lib配置到系统的path环境变量里面。
否则会报 exit status 3221225781 错误
在源码目录PlatON-Go下执行以下编译命令可生成platon、keytool、ctool可执行文件,如下:
go run build/ci.go install ./cmd/platon
go run build/ci.go install ./cmd/keytool
go run build/ci.go install ./cmd/ctool
编译完成之后在PlatON-Go/build/bin目录下会生成platon、keytool和ctool可执行文件,将此三个可执行文件拷贝到自己工作目录运行即可。
遇到问题可以执行以下脚本清除依赖库:
./build/build_deps.sh`
再下执行以下脚本编译所需依赖库:
./build/build_deps.sh
重复编译会覆盖之前生成的可执行文件。
执行该命令会编译全部可执行文件
go run build/ci.go install
第三步:生成节点密钥
生成节点的公私钥对
每个节点在网络中都有一个唯一的身份标识以便彼此区分,这个身份标识是一个公私钥对
在命令行执行以下命令,创建节点工作目录
mkdir platon-node
cd platon-node
在节点工作目录(platon-node)下通过以下命令生成:
mkdir -p data
keytool genkeypair | tee >(grep "PrivateKey" | awk '{print $2}' > ./data/nodekey) >(grep "PublicKey" | awk '{print $3}' > ./data/nodeid)
输出结果如下:
Address   :  0x6877944bC950799C0511beECB7824A818C35920D
PrivateKey:  002925955b165bd33be1d97082df17cd269f10e6f5142f77e2605ed591d314bf
PublicKey :  064a22d0bbf537125f1beeab0efcf77b0a62680d44f5b66a2d12574b159601e662edbb6b57aea5eafabbff8ba5157ef613fe4b176cb8d97ea4951b6815748973
其中’PrivateKey’是节点的私钥,'PublicKey’是节点的公钥,公钥用于标识节点身份,可以被公开出去,私钥不能公开并且需要做好备份。
同时会在节点工作目录下的子目录data中生成两个文件:
- nodeid 节点公钥(ID)文件,保存节点的公钥。
- nodekey 节点私钥文件,保存节点的私钥。
节点BLS公私钥
PlatON节点除了需要节点公私钥外还需要一种被称为BLS公私钥的密钥对,这个密钥对在共识协议中将被使用,跟节点公私钥对一样在节点工作目录(platon-node)下通过以下命令生成:
mkdir -p data
keytool genblskeypair | tee >(grep "PrivateKey" | awk '{print $2}' > ./data/blskey) >(grep "PublicKey" | awk '{print $3}' > ./data/blspub)
输出结果:
PrivateKey:  f22a785c80bd1095beff1f356811268eae6c94abf0b2b4e2d64918957b74783e
PublicKey :  4bf873a66df92ada50a8c6bacb132ffd63437bcde7fd338d2d8696170034a6332e404ac3abb50326ee517ec5f63caf12891ce794ed14f8528fa7c54bc0ded7c5291f708116bb8ee8adadf1e88588866325d764230f4a45929d267a9e8f264402
其中’PrivateKey’是节点的BLS私钥,'PublicKey’是节点的BLS公钥,BLS公钥用于共识协议中快速验证签名,可以被公开出去,BLS私钥不能公开并且需要做好备份。
同时会在节点工作目录下的子目录data中生成两个文件:
- blspub 节点BLS公钥文件,保存节点的BLS公钥。
- blskey 节点BLS私钥文件,保存节点的BLS私钥。
第四步:加入贝莱世界测试网
启动普通节点
执行以下命令即可启动验证节点加入贝莱世界:
./platon --identity platon --datadir ./data --port 16789 --testnet --rpcport 6789 --rpcapi "db,platon,net,web3,admin,personal" --rpc --nodekey ./data/nodekey --cbft.blskey ./data/blskey --verbosity 3 --rpcaddr 127.0.0.1 --syncmode "full"
启动归档节点
如果要启动归档节点加入贝莱世界,请执行以下命令:
./platon --identity platon --datadir ./data --port 16789 --db.nogc --testnet --rpcport 6789 --rpcapi "db,platon,net,web3,admin,personal" --rpc --nodekey ./data/nodekey --cbft.blskey ./data/blskey --verbosity 3 --rpcaddr 127.0.0.1 --syncmode "full"
提示:
| 选项 | 描述 |
|---|---|
| –identity | 指定网络名称 |
| –datadir | 指定data目录路径 |
| –rpcaddr | 指定rpc服务器地址 |
| –rpcport | 指定rpc协议通信端口 |
| –rpcapi | 指定节点开放的rpcapi名称 |
| –rpc | 指定http-rpc通讯方式 |
| –nodekey | 指定节点私钥文件 |
| –cbft.blskey | 指定节点bls私钥文件 |
| –testnet | 指定连接到测试网络,不指定默认运行主网络 |
更多参数意义通过platon --help命令查看。
当platon启动成功后,正常情况下会通过节点发现协议自动和距离自己最近的节点建立连接,连接成功后会启动区块同步,所以判断加入网络是否成功可以通过查看节点的peers同时确认当前节点块高是否增长来判断。
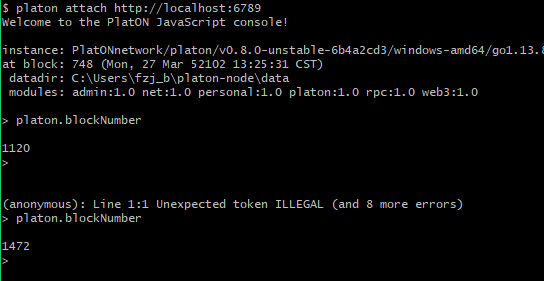
进入platon控制台
通过http方式进入platon控制台
./platon attach http://localhost:6789
查看节点的peers
在platon控制台中通过执行以下命令查看当前节点连接的所有peers。
> admin.peers
[{
    caps: ["cbft/1", "platon/62", "platon/63"],
    id: "0dd4e447cf23f4bfc94b1568bae626bf4894ce2e9d5ca474e3cc73ec7e9d4de550fffc1e2fc64cca25d42aecf6169cf8f8c0f4fe6adb847c33dc6ceb6f001bd1",
    name: "PlatONnetwork/platon/v0.8.0-unstable-c5fc6b19/linux-amd64/go1.11.11",
    network: {
      consensus: true,
      inbound: true,
      localAddress: "127.0.0.1:16789",
      remoteAddress: "127.0.0.1:47706",
      static: false,
      trusted: false
    },
    protocols: {
      cbft: {
        commitBn: 0,
        highestQCBn: 0,
        lockedBn: 0,
        protocolVersion: 1
      },
      platon: {
        head: "0x88a4fe315ce13b3010abf4ab5d120f25a21ac2ccae8ec563ad259e47e24b24bc",
        number: 0,
        version: 63
      }
    }
},
...
]
查看当前块高
通过在platon控制台中执行以下命令查看当前节点的块高。
> platon.blockNumber
2235
>
节点列表中出现一系列测试网络节点并且块高在不断增长,则表示连接成功!
未完待续