Introduction
Alaya Cross-chain system is the bridge between the assets on Alaya network and Ethereum that allows users to convert their Ethereums-based assets (including ETH and ERC token) to the equivalent Alaya’s ARC 20 token. Compared with Ethereum, Alaya has better performance and lower costs, which makes Alaya more competitive in the distributed applications. Besides, the cross-chain system enables Alaya’s cross-chain assets to go back to Ethereum painlessly.
Supported Ethereum-based assets: ETH and USDT.
Guide
1. Preparations
-
Install Ethereum Chrome browser plug-in MetaMask (https://metamask.io/), and create or import your Ethereum wallet that is used for corss-chain in MetaMask. Meanwhile, prepare the Ethereum-based assets for cross-chain. Notice that the network that MetaMask connects to should be “Ethereum main net”
-
Install Alaya Chrome browser plug-in Samurai (for the guide of Samurai, please check: User Guide of Samurai. User Guide of Samurai | by PlatON Network | Medium), and create or import the Alaya wallet for cross-chain.
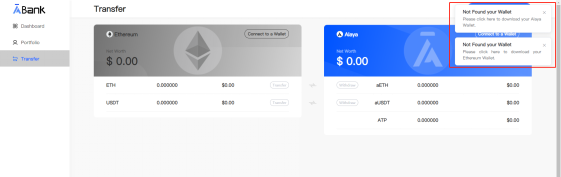
Notice that, when you find that no MetaMask or Samurai installed on your browser after entering into the ABank (https://abank.alaya.network/) system, you will see the hint on the dialog box that guides you to download the wallets.
2. Connect to a Wallet
-
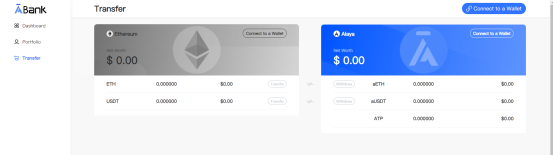
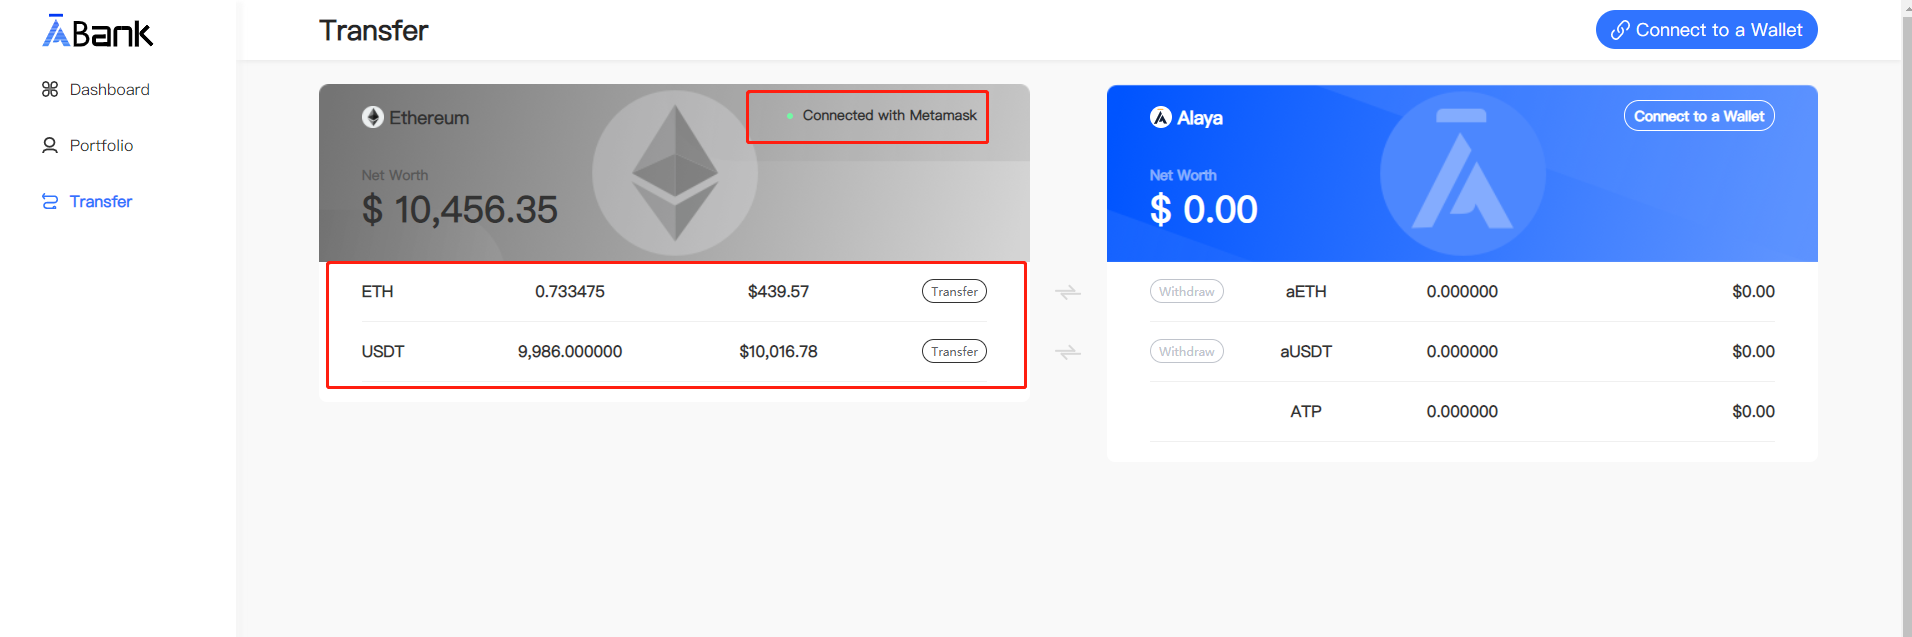
Enter into ABank, and click “Transfer” located at the left panel to enter into the cross-chain page;
-
Click “Connect to a Wallet” at the “Ethereum” module. If MetaMask is installed and enabled, the authorization page will pop up. Select “Wallet”, and then “Connect to a Wallet”. After that, you can check your balance on ABank.


Note:
1. If MetaMask is locked, you need to input the password to unlock it;
2. If no created wallets in MetaMask, please create one first;
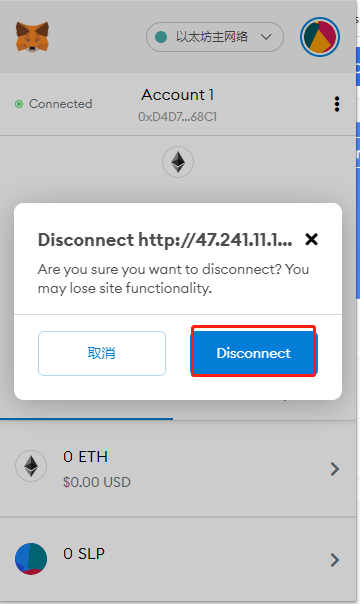
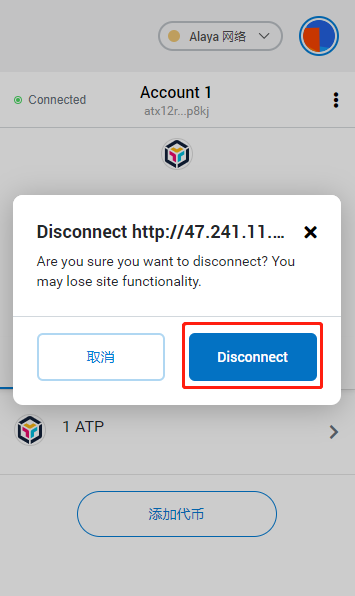
3. If you need to change the connected wallet, please disconnect the existing wallets following these two methods below. After that, connect to a new wallet:
Method 1: Manage MetaMask while keeping ABank system launched;
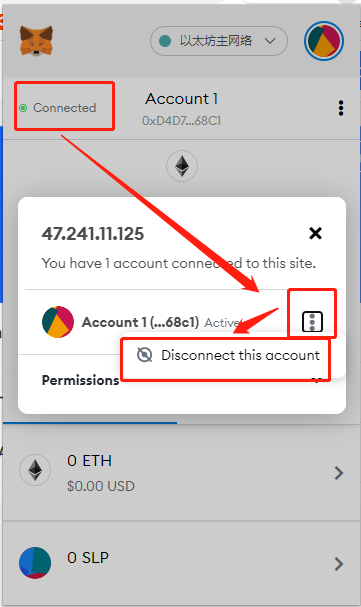
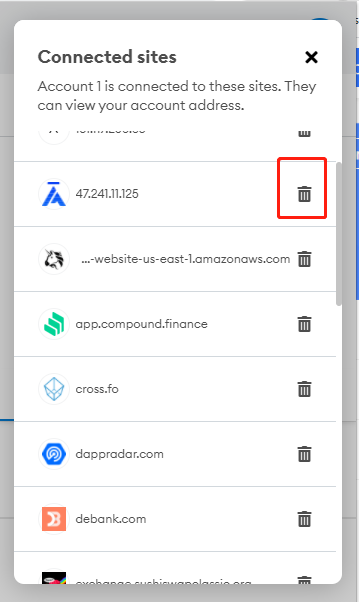
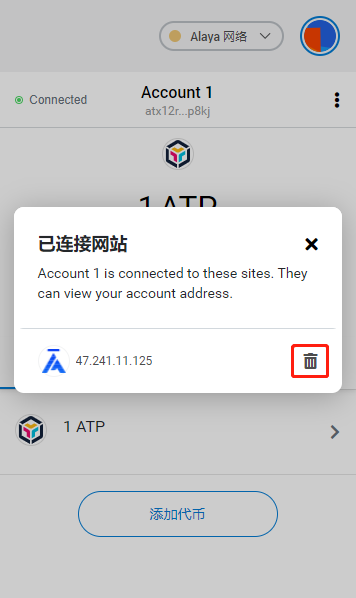
Method 2: Find the connected ABank shown in picture 2 and disconnect it

- Move to “Alaya” module, and click “Connect to a Wallet”. Under the circumstance that Samurai is installed and enabled, the connection authorization window of Samurai will pop up. Just select the wallet and click “Confirm”, then your Samurai has successfully connected to the wallet, and you can check its balance (including ETH and USDT after cross-chain). Hence, the currently connected wallet is the receiving wallet address for the Ethereum asset that has been transferred to Alaya network.
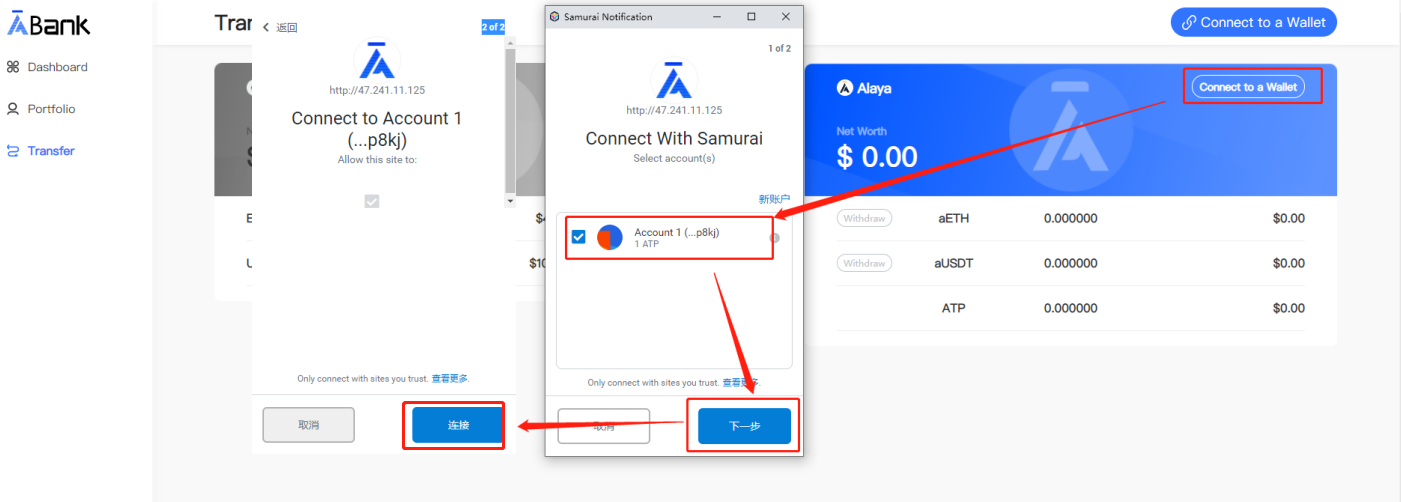
Note:
1. If Samurai is locked, you need to input the password to unlock it;
2. If no created wallets in Samurai, please create one first;
3. If you need to change the connected wallet, please disconnect the existing wallets following these two methods below. After that, connect to a new wallet:
Method 1: Manage Samurai while keeping ABank system launched;
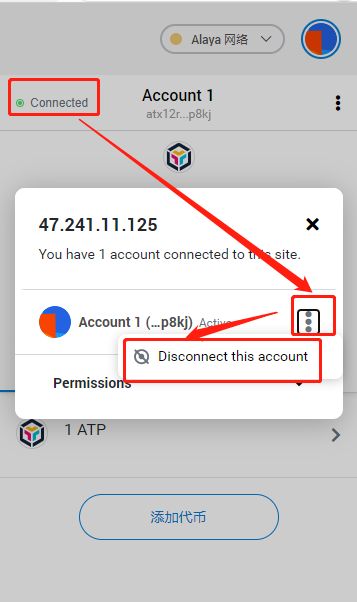
Method 2: Find the connected ABank shown in picture 2 and disconnect it

3. Transfer Ethereum Assets over to Alaya Network
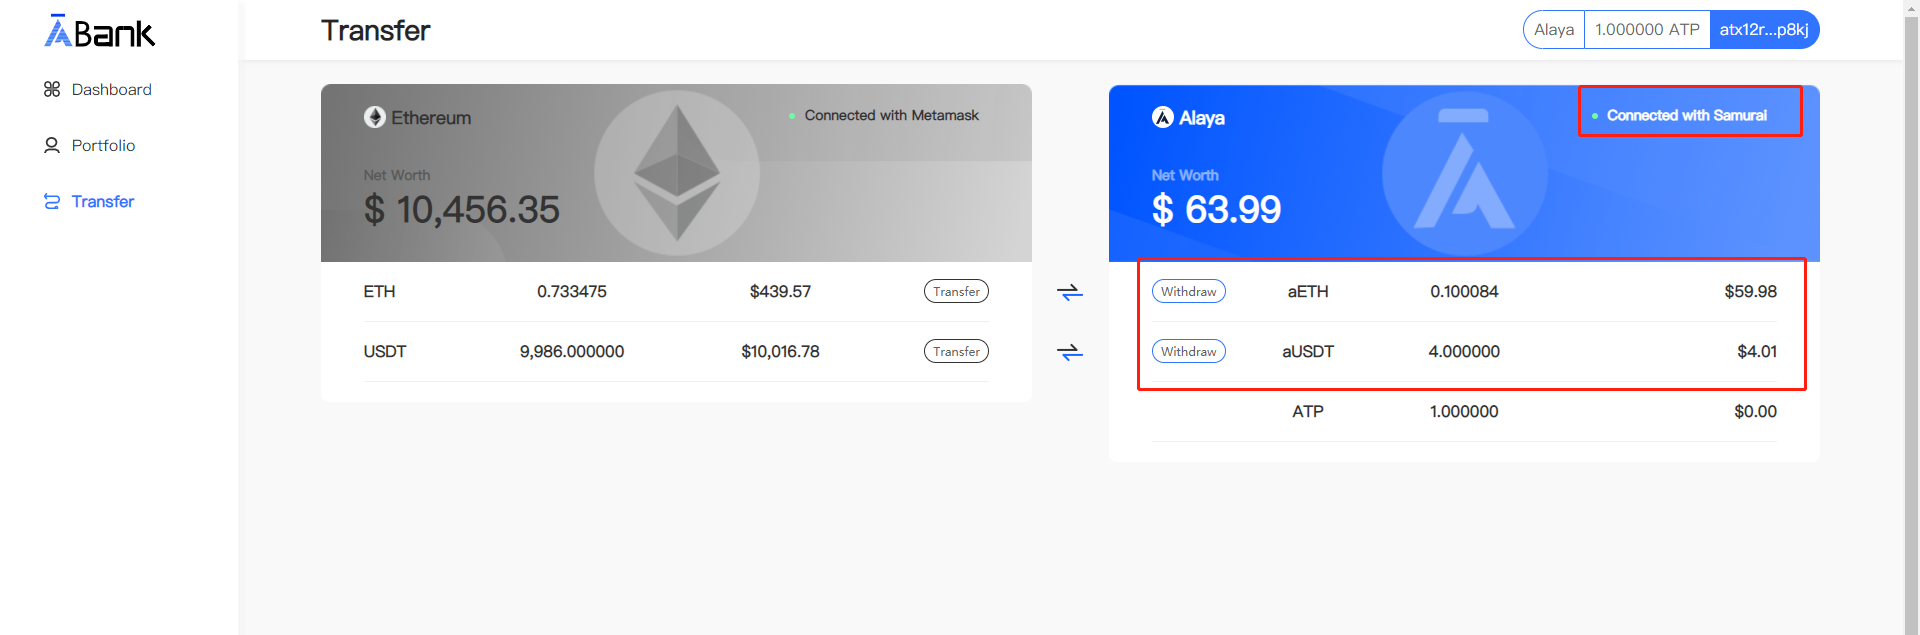
Make sure Ethereum-MetaMask and Alaya-Samurai are connected, if the balance of ETH or USDT is not 0, you can transfer it from Ethereum to Alaya network. And the “Transfer” button is enabled accordingly.
-
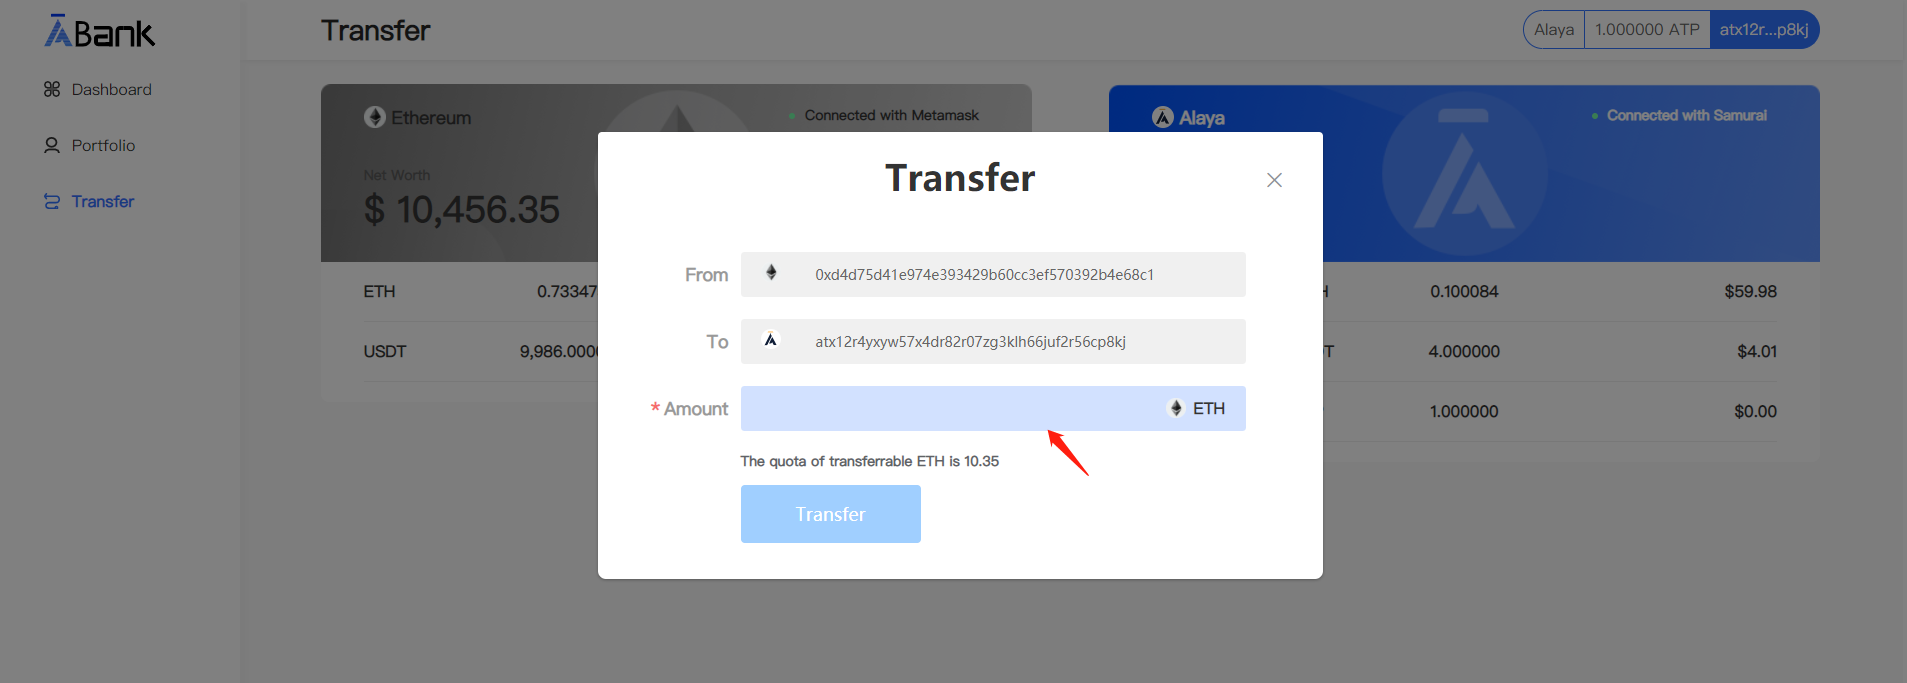
Click “Transfer”, you can check where the transfer starts from and goes to from the dialog box, among which the “To” is the related wallet address connected to Alaya for the purpose of receiving the transferred Ethereum assets (To ensure the wallet address is correct and follows regulations, wallet address edit is disabled. If you want to modify the wallet address, please disconnect the wallet address first and then connect to the new wallet address you want).
-
Input the amount of Ethereum asset that would be transferred over to Alaya to initiate the transfer;
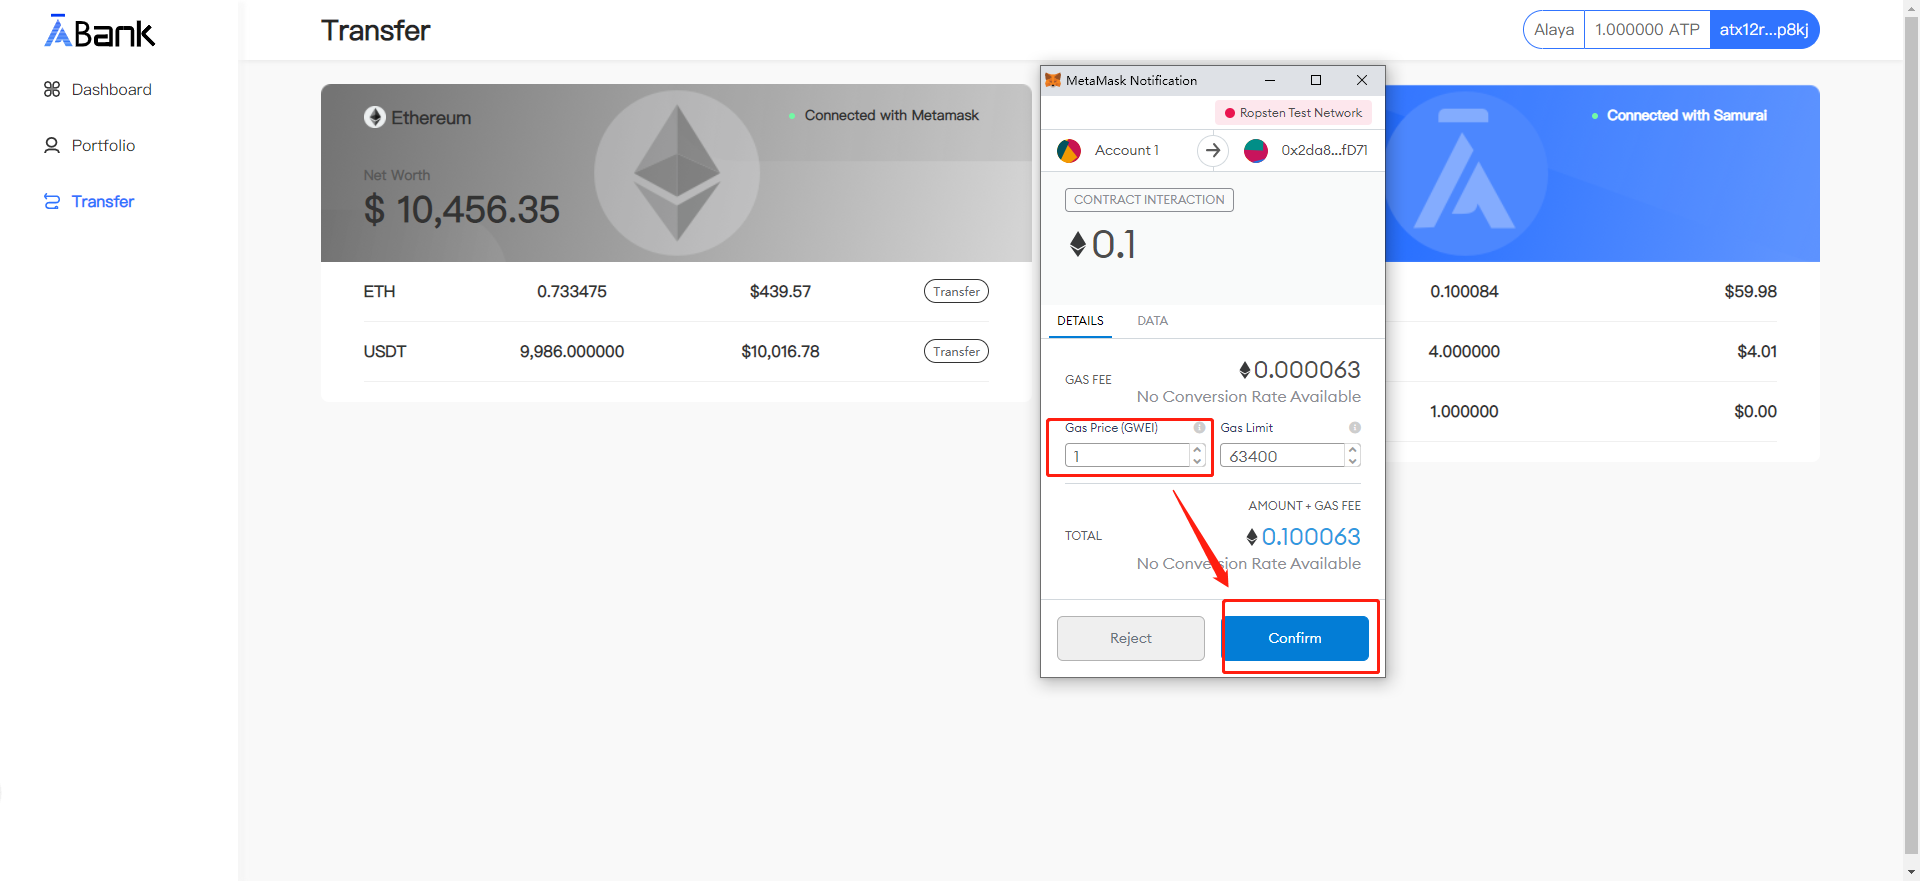
If it’s Ethereum cross-chain, you can just click “Transfer” to submit it. On the popped up MetaMask transaction confirmation page, you can define the gasprice to improve the transaction confirmation efficiency. After it’s confirmed, the transaction is submitted.
If it’s USDT or other ERC20 tokens, please click “Approve” for authorization if it’s the first cross-chain. After then, click “Confirm” on the popped up MetaMask confirmation transaction page, the transaction is authorized.
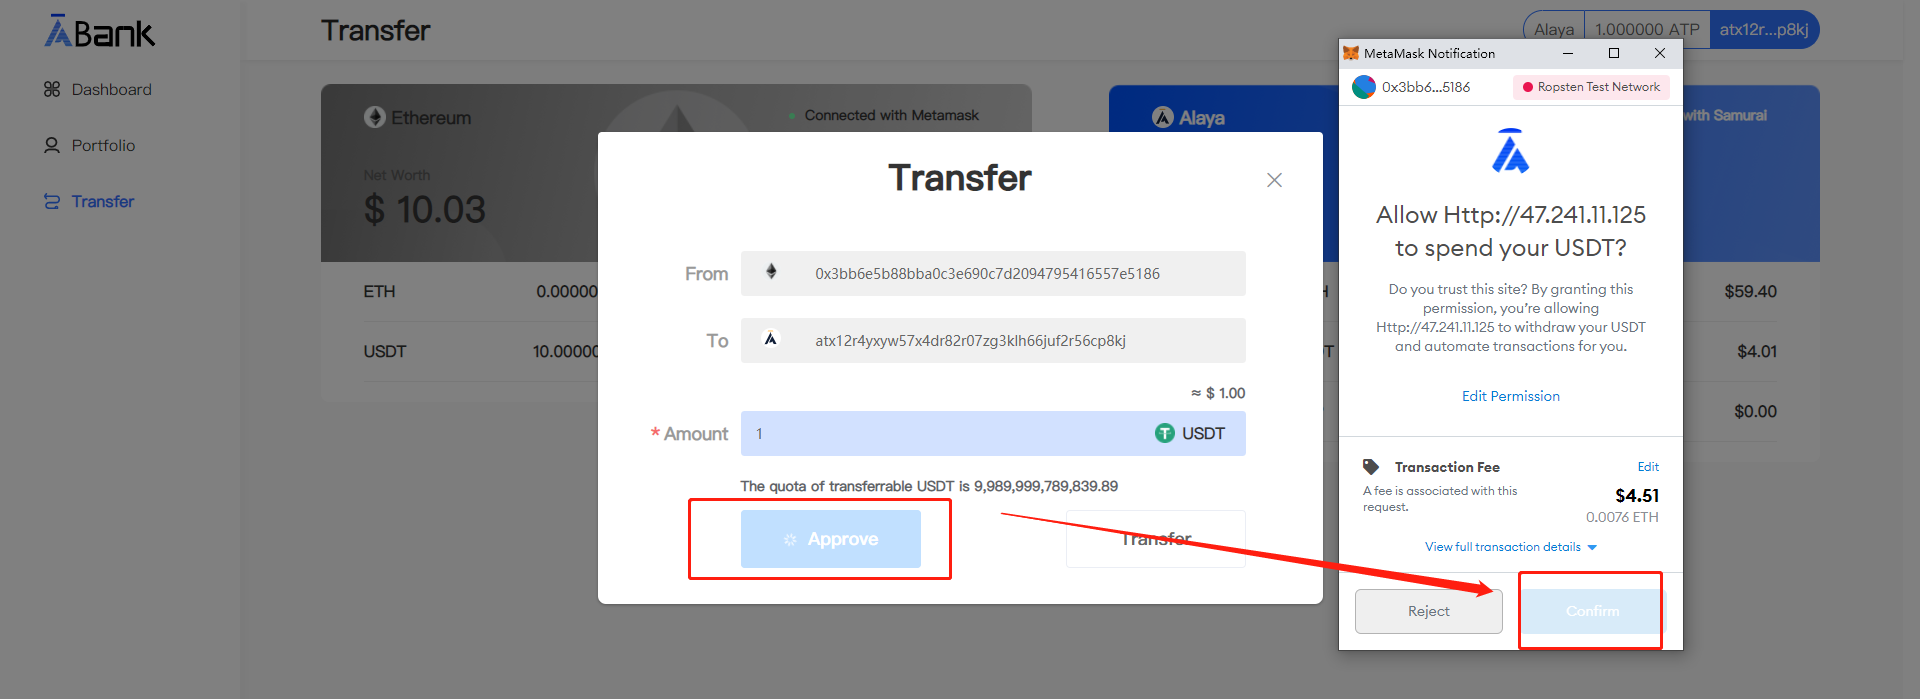
After the authorization is succeed, you can click “Transfer” to submit the asset cross-chain transaction. You can also define the gasprice on the popped up MetaMask transaction confirmation page to improve the transaction confirmation efficiency, and then click “Confirm” to submit the transaction.
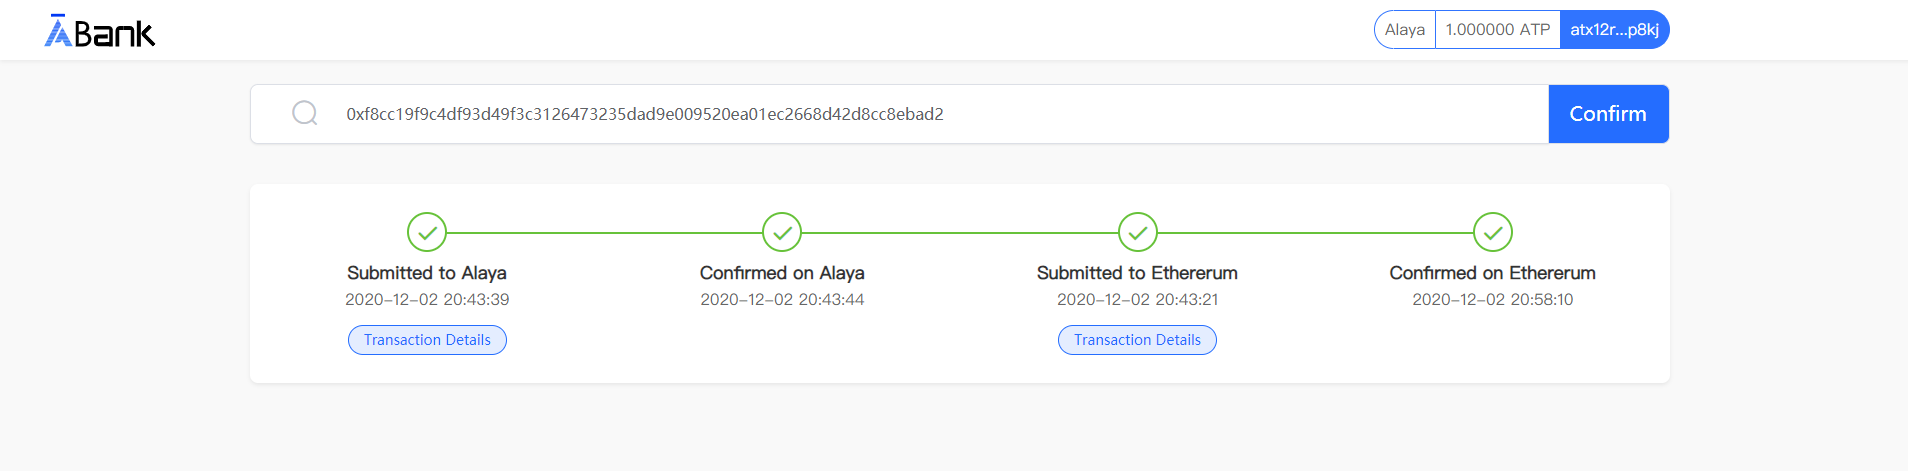
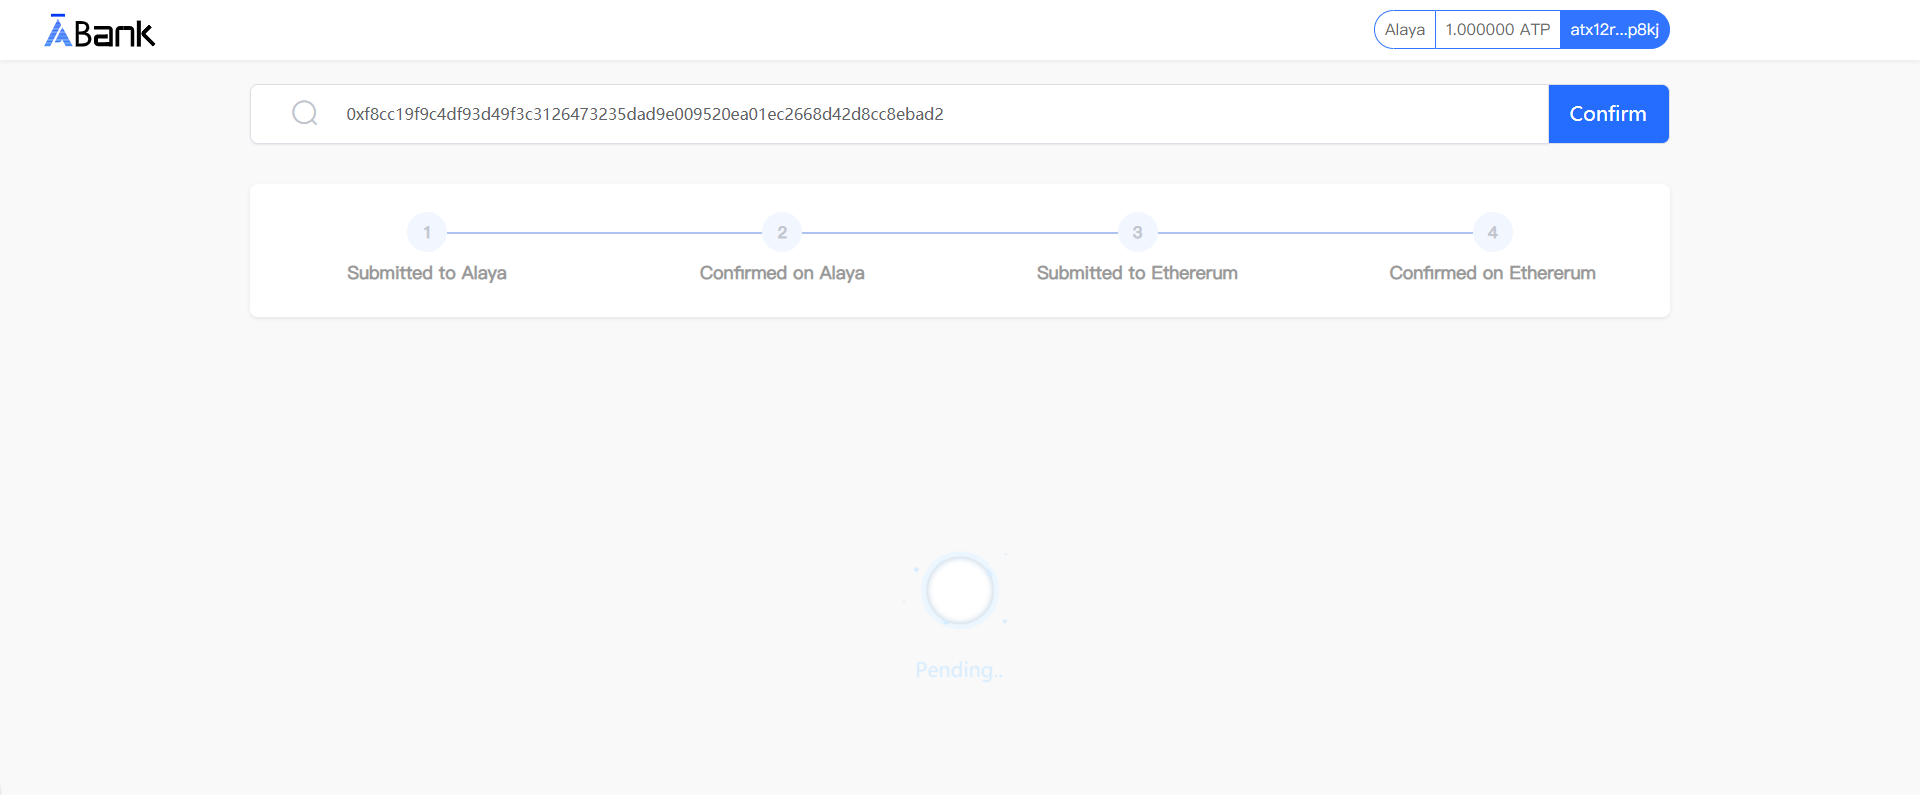
- After the cross-chain transaction is submitted, the cross-chain transaction progress enquiry page showing the transaction hash and four progress status will pop up.

Note that it will take 6 -10 mins to complete the cross-chain that transfers the Ethereum assets to Alaya network, please be patient.
- When the four progresses all finish, this Ethereum asset cross-chain is completed. You can check the related aETH or aUSDT cross-chain assets at Alaya module.
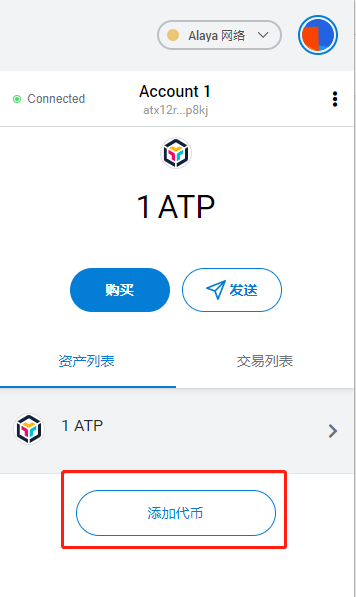
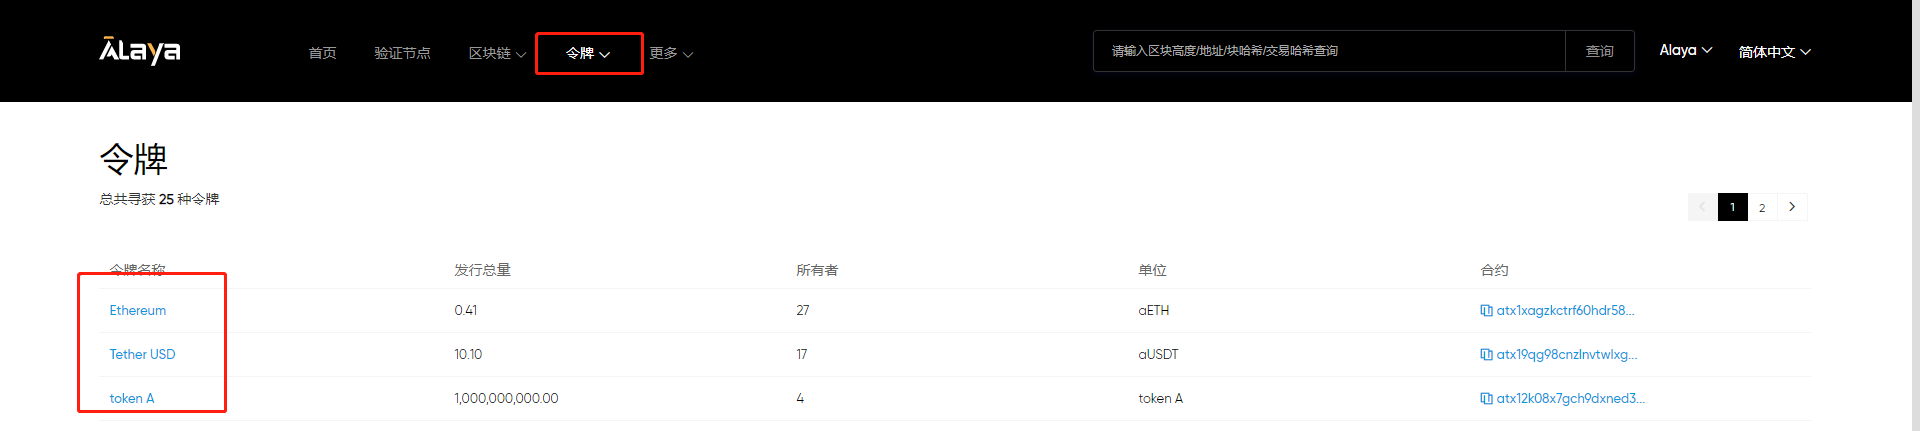
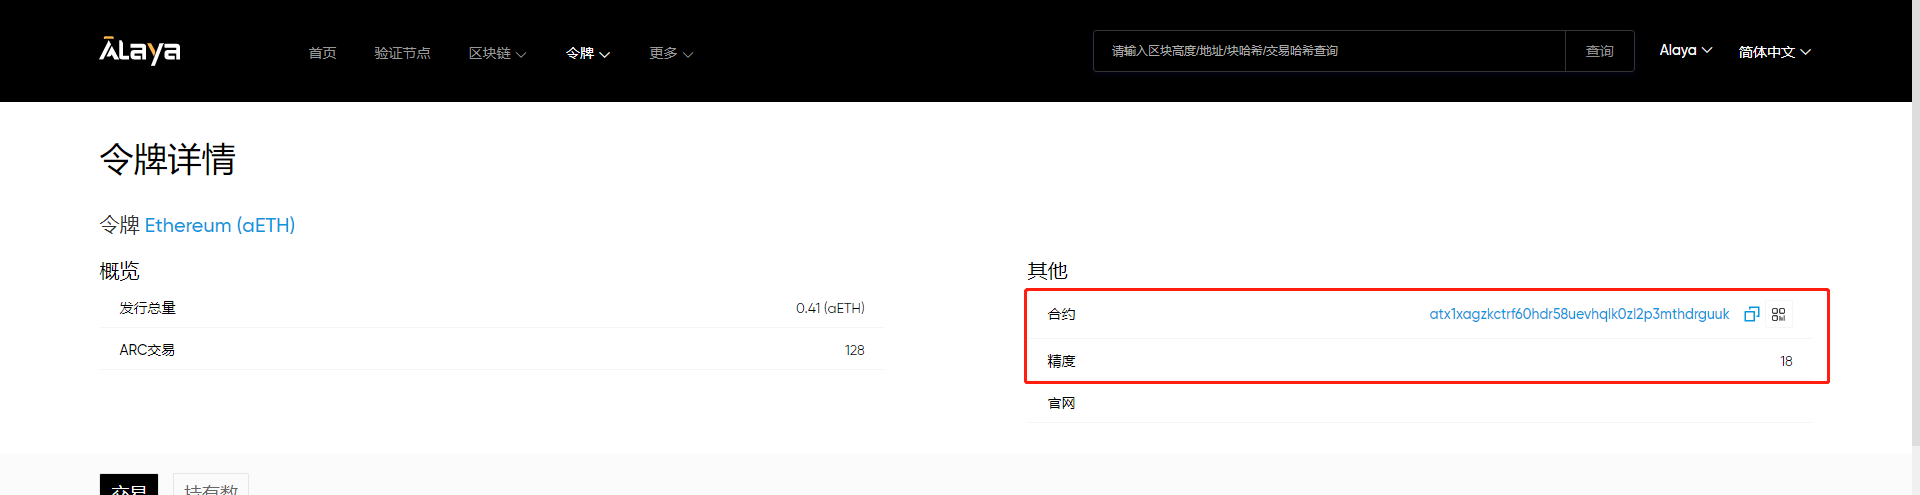
Note: if you need to check the Alaya cross-chain assets in Samurai, please move to Samurai asset list and click “Add token”, then input the related token info. You can find the token info following: Alaya — Scan — Token — Token list (Alaya Blockchain Explorer, please use the officially authorized token contract).

4. Withdraw the Alaya cross-chain assets to Ethereum
Under the circumstance that Ethereum-MetaMask and Alaya-Samurai are connected successfully, if the Alaya cross-chain assets, namely aETH or aUSDT is not 0, you can withdraw it. This time, the “Withdraw” button is enabled.
-
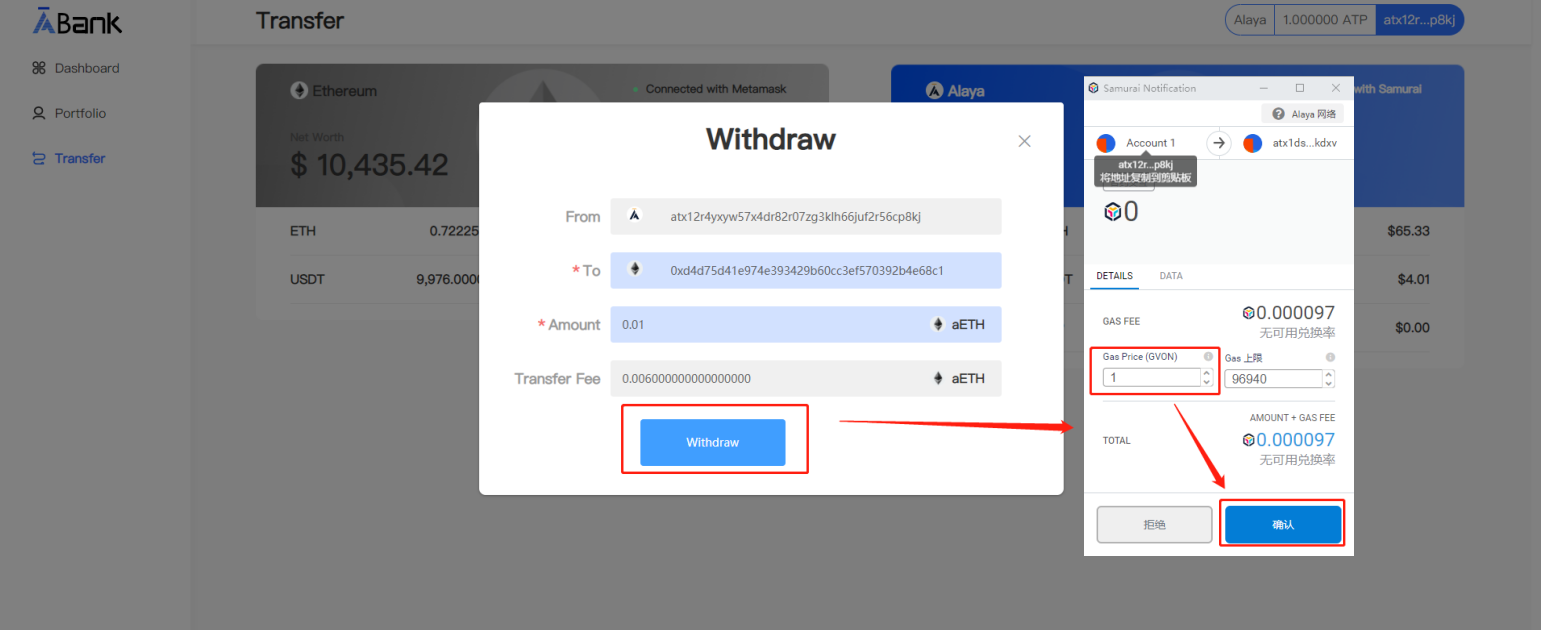
Click “Withdraw”, you can check where the withdraw starts from and goes to from the dialog box, among which the “To” is the related wallet address connected to Ethereum for the purpose of receiving the withdraw Ethereum assets.
-
Input the amount of withdraw cross-chain asset that would be withdraw from Alaya to Ethereum, to initiate the withdraw. You can define the gasprice to improve the transaction confirmation efficiency. After it’s confirmed, the transaction is submitted.
4. Withdraw the Alaya cross-chain assets to Ethereum
Under the circumstance that Ethereum-MetaMask and Alaya-Samurai are connected successfully, if the Alaya cross-chain assets, namely aETH or aUSDT is not 0, you can withdraw it. This time, the “Withdraw” button is enabled.
-
Click “Withdraw”, you can check where the withdraw starts from and goes to from the dialog box, among which the “To” is the related wallet address connected to Ethereum for the purpose of receiving the withdraw Ethereum assets.
-
Input the amount of withdraw cross-chain asset that would be withdraw from Alaya to Ethereum, to initiate the withdraw. You can define the gasprice to improve the transaction confirmation efficiency. After it’s confirmed, the transaction is submitted.
Note that it will take 6 -10 mins to complete the withdraw from Alaya network to Ethereum, please be patient.
- When the four progresses all finish, this Alaya cross-chain asset has been withdraw to the specific Ethereum receiving wallet address. You can check the status in the receiving wallet address.